- Home
- Food Recipe
- Transform Your Kitchen With This Must Try Homemade Bread Loaf Recipe
Transform Your Kitchen With This Must Try Homemade Bread Loaf Recipe
Activate yeast, mix it with flour, salt, and butter to form a dough, then knead until smooth. After the dough rises, shape it into a loaf, let it rise again, and bake at 375 F until golden. Brush with melted butter and cool before serving.

Harpreet Kour Updated: Oct 19, 2024 9:00 AM IST
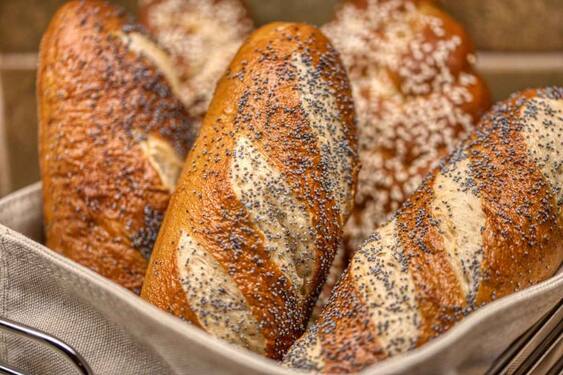
To make a homemade bread loaf, first activate the yeast by combining it with warm water and sugar until frothy. Mix flour, salt, melted butter, and the yeast mixture to form a dough, then knead for 8-10 minutes until smooth. Let the dough rise in a warm place for 1-2 hours until doubled in size. Shape the dough into a loaf and allow it to rise again in a greased loaf pan for 30-45 minutes. Bake at 375 F for 30-35 minutes until golden brown. Once baked, brush with melted butter and cool before slicing.
Ingredients:
- 3 cups (450g) all-purpose or bread flour (plus extra for dusting)
- 1 packet (2 tsp or 7g) active dry yeast
- 1 cups (300ml) warm water (about 110 F/45 C)
- 2 tbsp sugar
- 2 tbsp unsalted butter (melted)
- 1 tsp salt
- Extra butter for brushing (optional)
Instructions
Step 1: Activate the Yeast
- In a small bowl, combine the warm water (ensure it's not too hot to avoid killing the yeast) with sugar. Stir until the sugar dissolves.
- Sprinkle the active dry yeast over the water and let it sit for about 5-10 minutes until it becomes frothy and bubbly. This indicates that the yeast is active and ready.
Step 2: Mix the Dough
- In a large mixing bowl, combine flour and salt.
- Once the yeast is frothy, pour the yeast mixture into the flour mixture.
- Add the melted butter and stir using a wooden spoon or a stand mixer with a dough hook attachment. Mix until the dough comes together.
- If the dough seems too dry, you can add a tablespoon of water at a time. If it's too wet, add a little more flour (but only a teaspoon at a time) until the dough is soft but not sticky.
Step 3: Knead the Dough
- Transfer the dough onto a lightly floured surface.
- Knead the dough by hand for about 8-10 minutes (or use a stand mixer for about 5-6 minutes). Knead until the dough is smooth, elastic, and slightly springy. The dough should no longer be sticky to the touch.
- Kneading tip: Fold the dough over itself, push down with the heels of your hands, turn it 90 degrees, and repeat.
Step 4: First Rise (Proofing)
- Grease a large bowl with oil or butter and place the kneaded dough into the bowl. Turn the dough over so it's lightly coated in oil on all sides.
- Cover the bowl with a damp cloth or plastic wrap and let the dough rise in a warm, draft-free spot for 1-2 hours, or until the dough has doubled in size.
- Tip: A good warm place for rising dough is the oven with just the light on (not heated) or near a sunny window.
Step 5: Shape the Dough
- Once the dough has risen, gently punch it down to release the trapped air.
- Turn the dough onto a lightly floured surface and shape it into a rectangle about 8 inches wide (the length of your loaf pan).
- Roll the dough tightly into a log, tucking the ends under, and place it into a greased 9x5-inch loaf pan seam-side down.
Step 6: Second Rise
- Cover the loaf with a cloth or plastic wrap and let it rise for another 30-45 minutes until it has doubled in size and puffed up above the edges of the loaf pan.
Step 7: Preheat the Oven
- Preheat your oven to 375 F (190 C) during the last 15 minutes of the second rise.
Step 8: Bake the Bread
- Once the bread has risen for the second time, place the loaf in the preheated oven.
- Bake for 30-35 minutes, or until the bread is golden brown on top and sounds hollow when tapped on the bottom. You can also use a food thermometer the internal temperature should reach about 190 F (88 C).
- Tip: If the top is browning too quickly, you can cover it loosely with aluminum foil halfway through baking.
Step 9: Cool the Bread
- Remove the bread from the oven and immediately brush the top with melted butter for a soft, glossy finish (optional but recommended).
- Let the bread rest in the pan for 10 minutes, then carefully transfer it to a wire rack to cool completely before slicing.
Serving and Storing
- Once completely cooled, slice the bread with a serrated knife and enjoy with butter, jam, or any spread.
- Store the bread at room temperature in an airtight container or wrapped in plastic wrap for up to 3 days. For longer storage, freeze slices wrapped in plastic wrap and placed in a freezer-safe bag for up to 3 months.
Tips for Success:
- Check the yeast: Make sure your yeast is fresh. Expired yeast won't rise well.
- Water temperature: Ensure the water is warm (about 110 F/45 C) to properly activate the yeast.
- Kneading: Kneading is key to building the gluten structure, which gives the bread its texture.
- Patience during rising: Allow the dough to rise in a warm environment to achieve the perfect texture.
This method creates a soft, fluffy loaf with a golden crust, perfect for sandwiches, toast, or snacking.
